How to Start a Visit Recording
Overview
Coral's Scribe captures a patient encounter — either by recording live audio or by importing a transcript you already have — and turns it into an editable transcript and an AI summary. That transcript is the foundation for the codes, clinical notes, and claim that follow, so it's worth getting a clean recording.
This guide walks through recording a visit from start to finish.
Before you begin
- Open the patient's visit from the Dashboard or the Visits list.
- Make sure you're on the Scribe tab (it's the first tab inside a visit).
- For live recording, use a browser that can access your microphone, and allow the microphone prompt when it appears.
Step 1 — Open the Scribe tab
Inside a visit, select the Scribe tab. The header above the tabs shows the patient, the visit date, the provider, and the total time recorded on this visit so far (for example, 56m 16s).
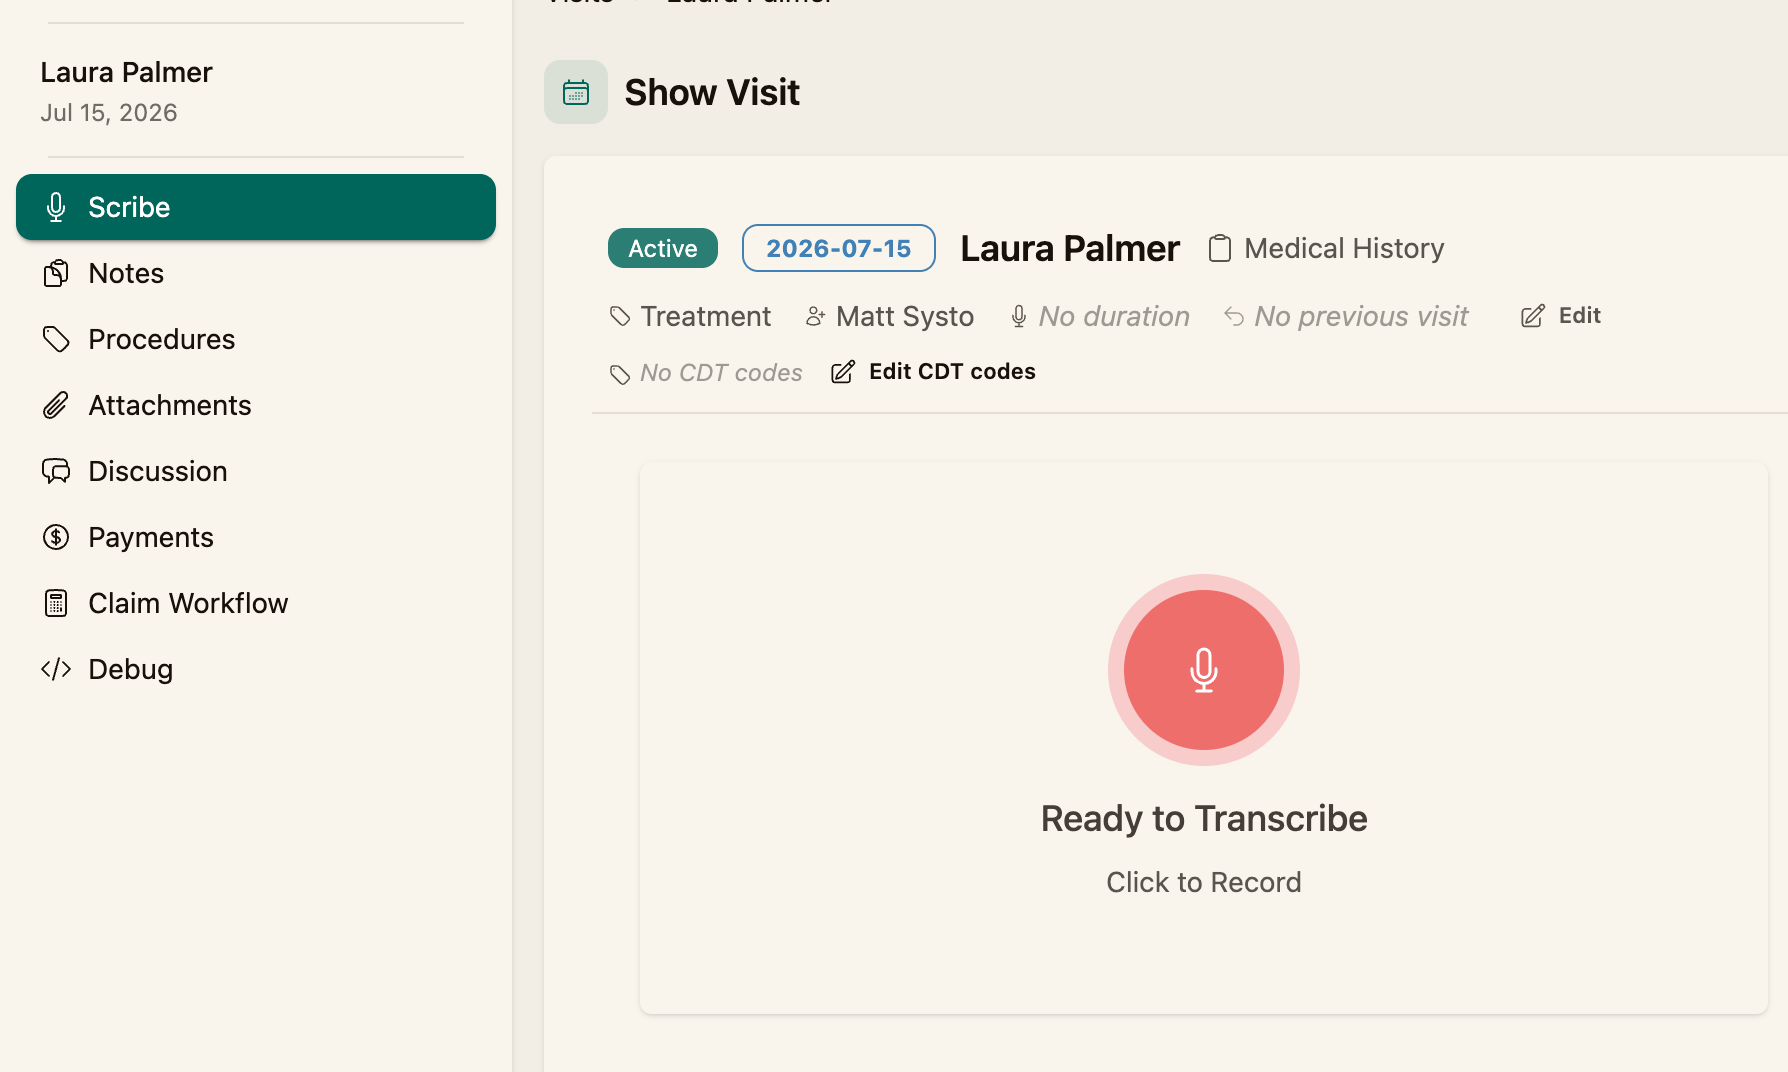
Step 2 — Start recording
Click the Click to Record microphone button. Speak naturally through the visit — as you talk, the Live Transcript panel on the right fills in with the transcription.
When the visit (or the part you want to capture) is finished, click the button again to stop.
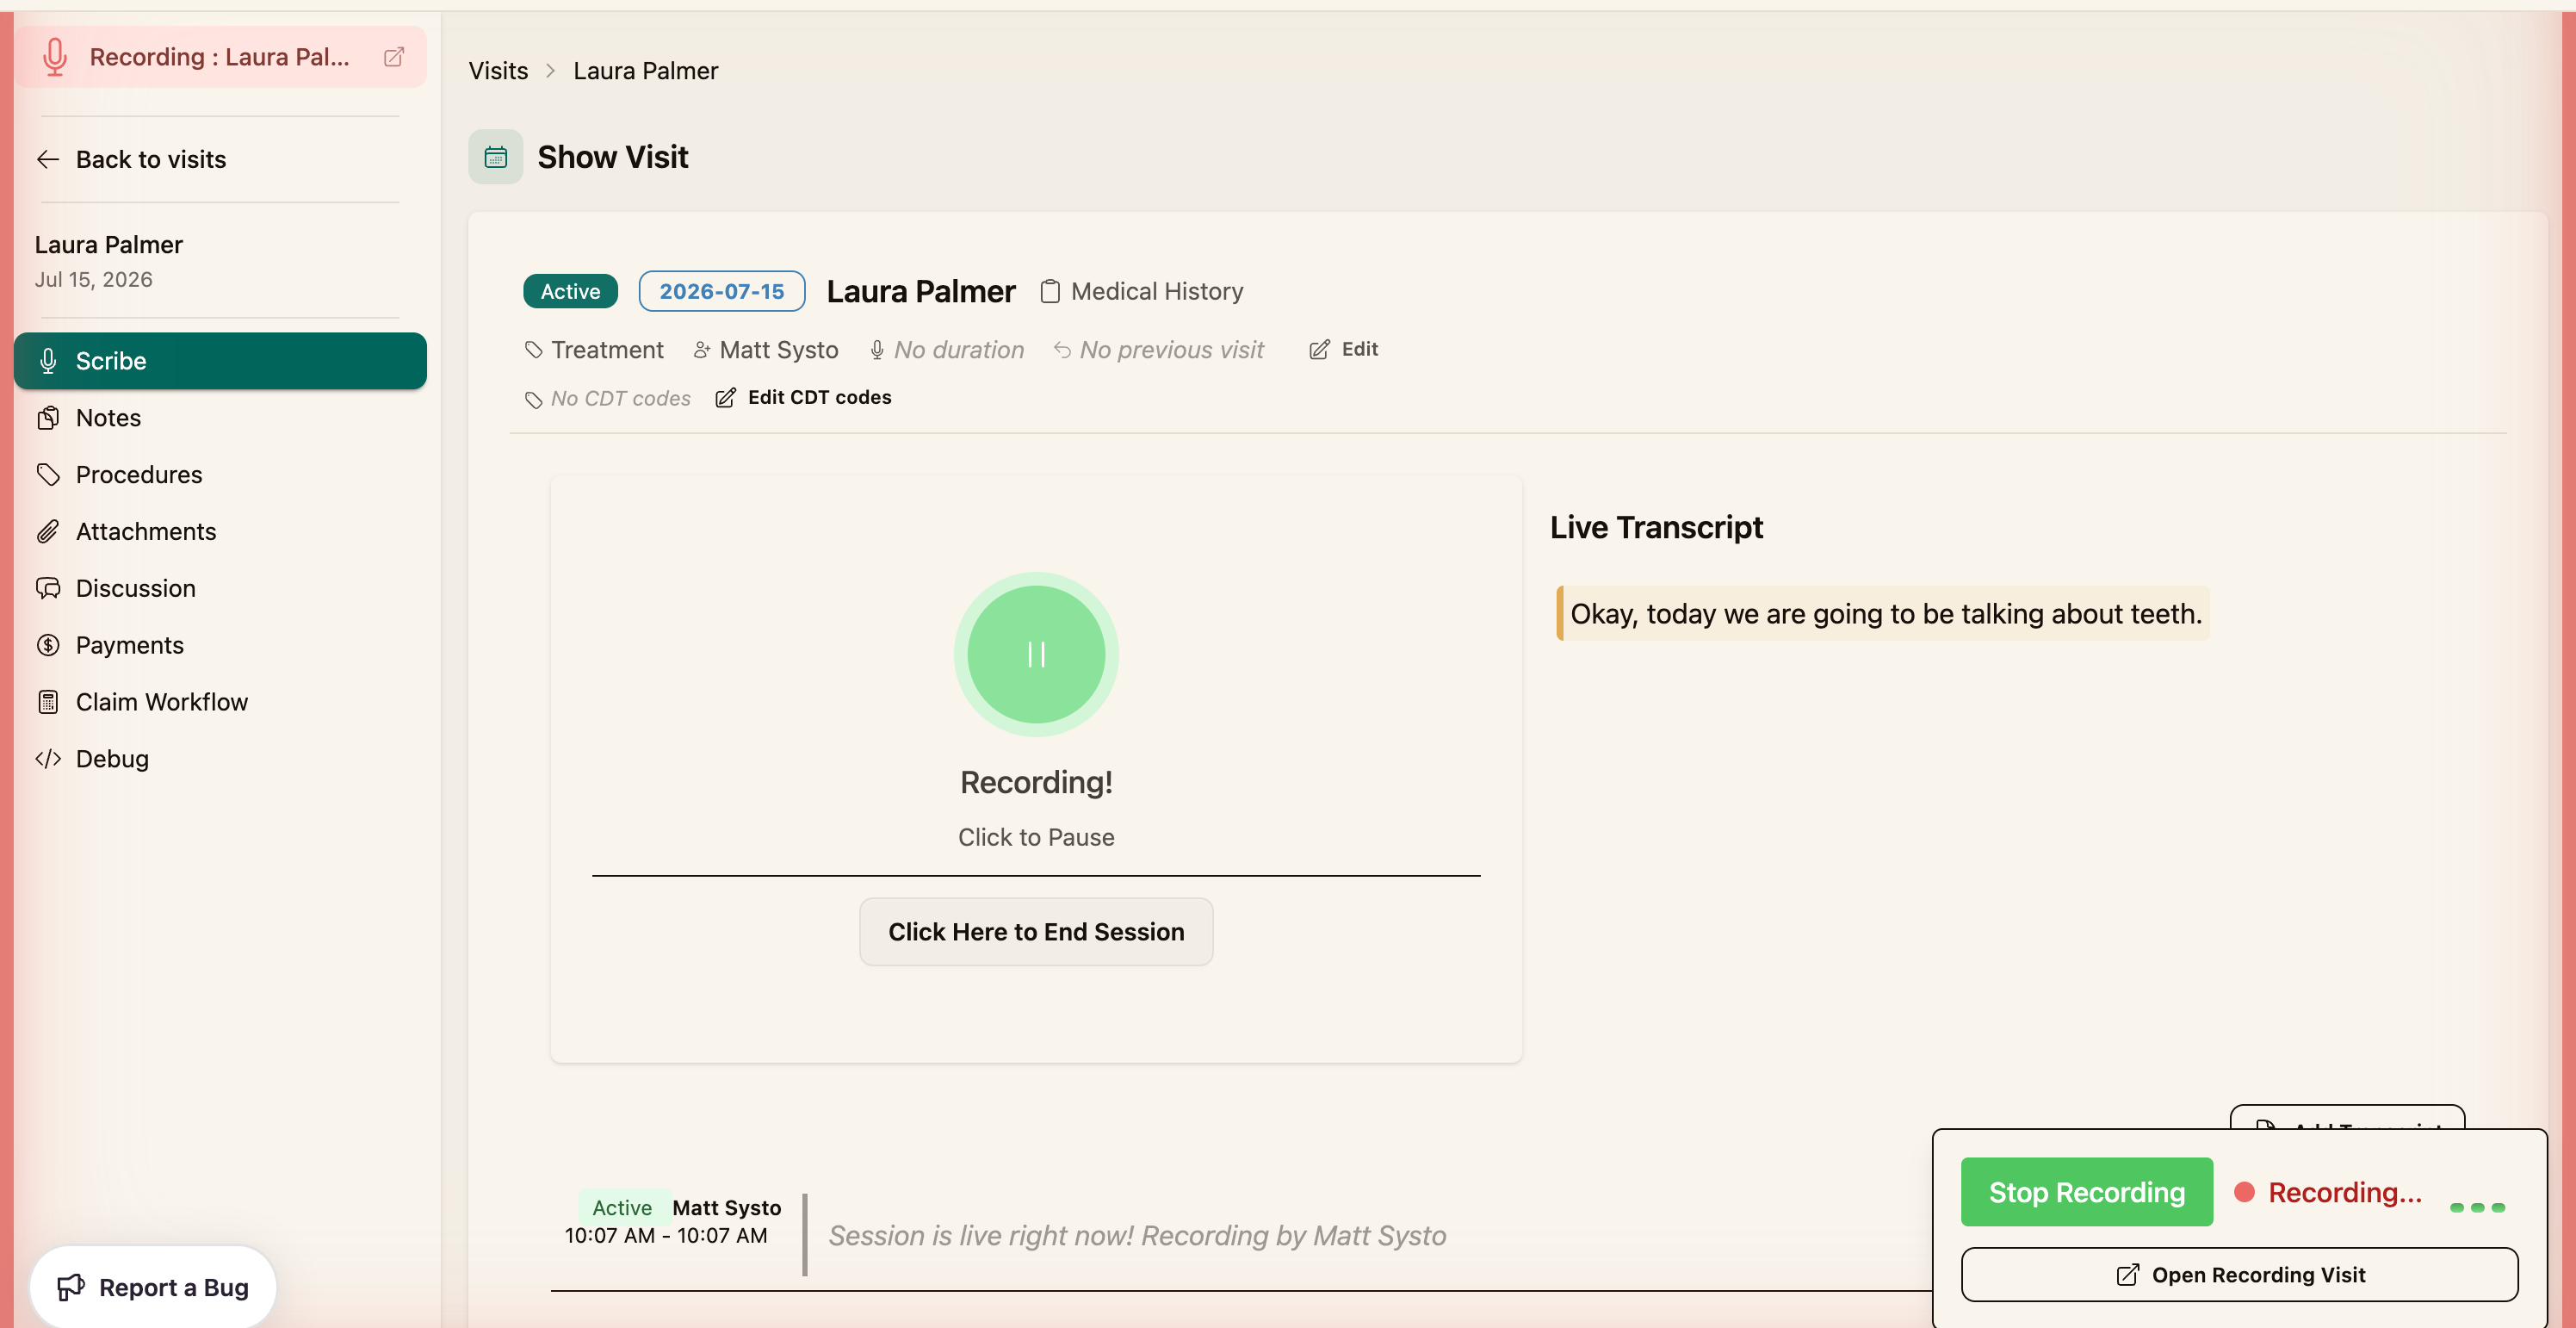
Once the visit has ended, click the Click Here To End Session button. This triggers the Transcript Summary generation.
You don't have to capture the whole visit in one take. You can start and stop recording as many times as you need — each pass is added to the same visit, and the header's total recorded time updates accordingly.
If recording doesn't start, your browser is likely blocking microphone access. Click the microphone icon in your browser's address bar, set this site to Allow, and reload the page. No audio is captured until you click the record button.
Step 3 — (Alternative) Import an existing transcript
If you already have a transcript from another tool, you can add it instead of recording live.
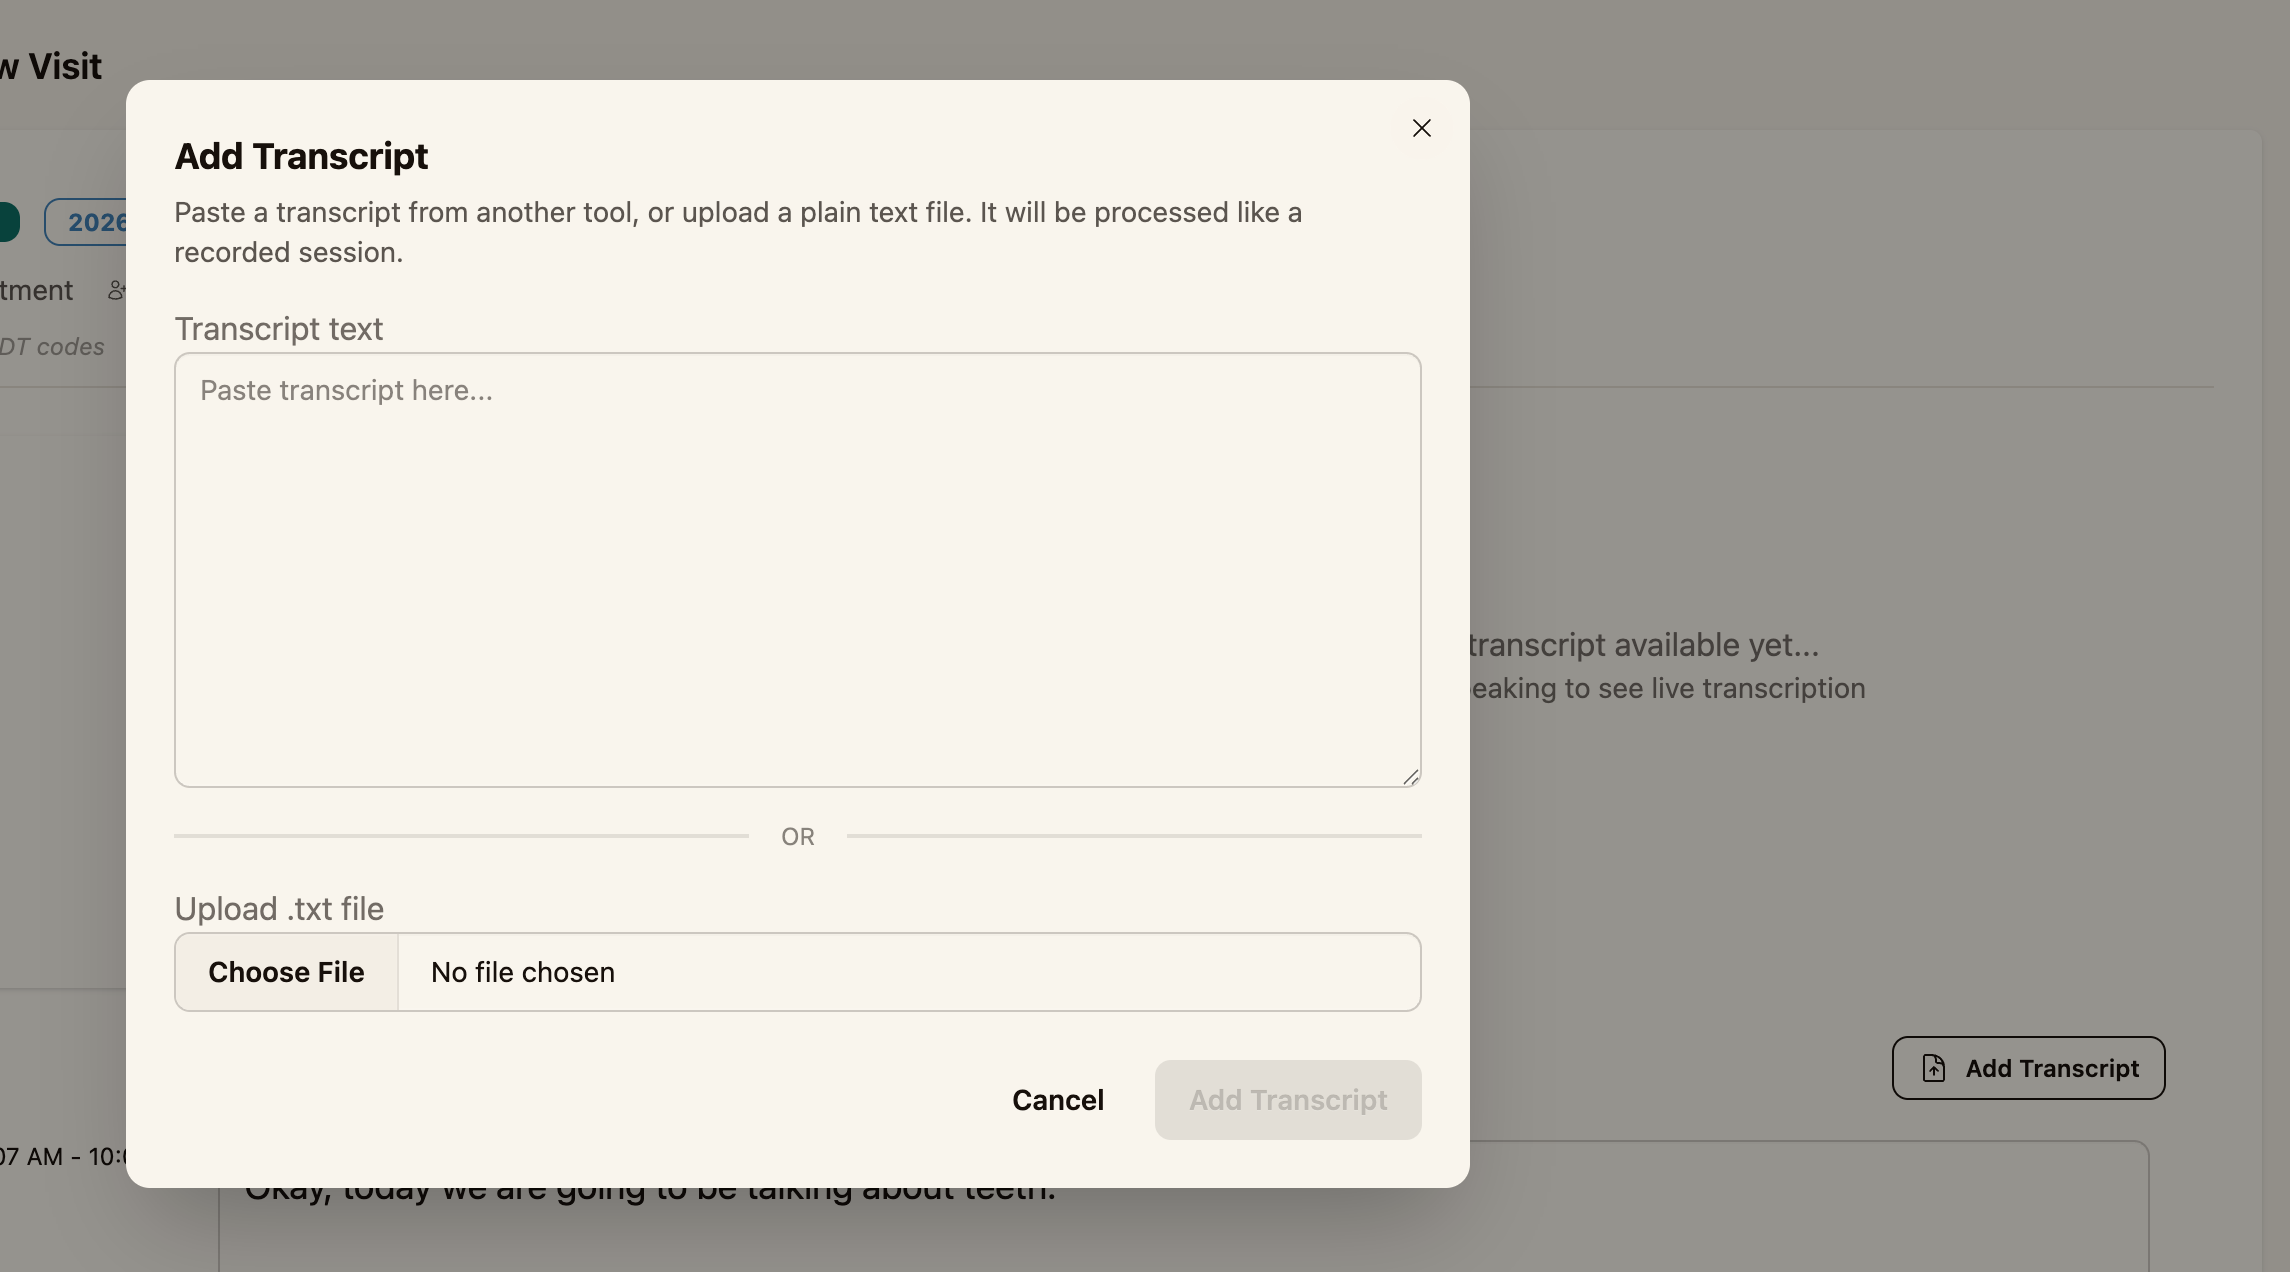
- Under the Live Transcript panel, click Add Transcript.
- In the dialog, either paste the transcript text into the text box, or click Choose File to upload a plain
.txtfile. - Click Add Transcript.
Coral processes the imported transcript exactly like a recorded session.
Step 4 — Review and clean up the transcript
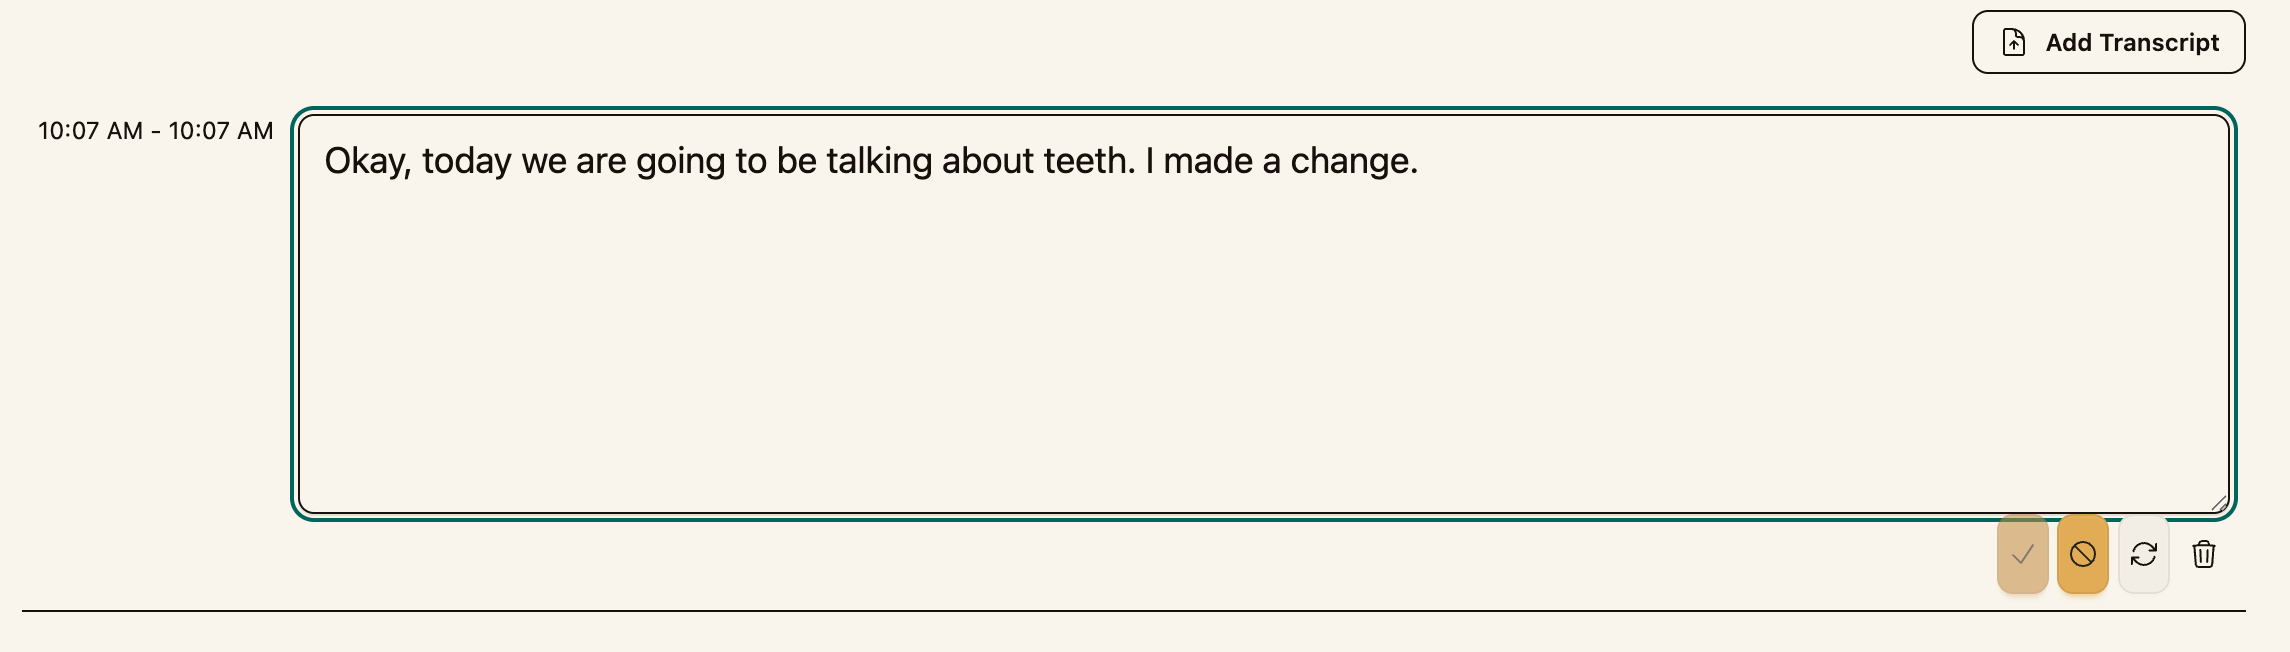
Each recording or import appears as a transcript segment, labeled with the speaker and a timestamp. Read through and correct anything the transcription misheard — a cleaner transcript produces better codes and a better summary.
Each segment has inline controls:
- Save — keep your edits to a segment
- Reset — revert a segment to its original text
- Cancel — discard the edit you're currently making
- Delete — remove a segment entirely (useful for an accidental recording)
Step 5 — Find your AI summary and continue
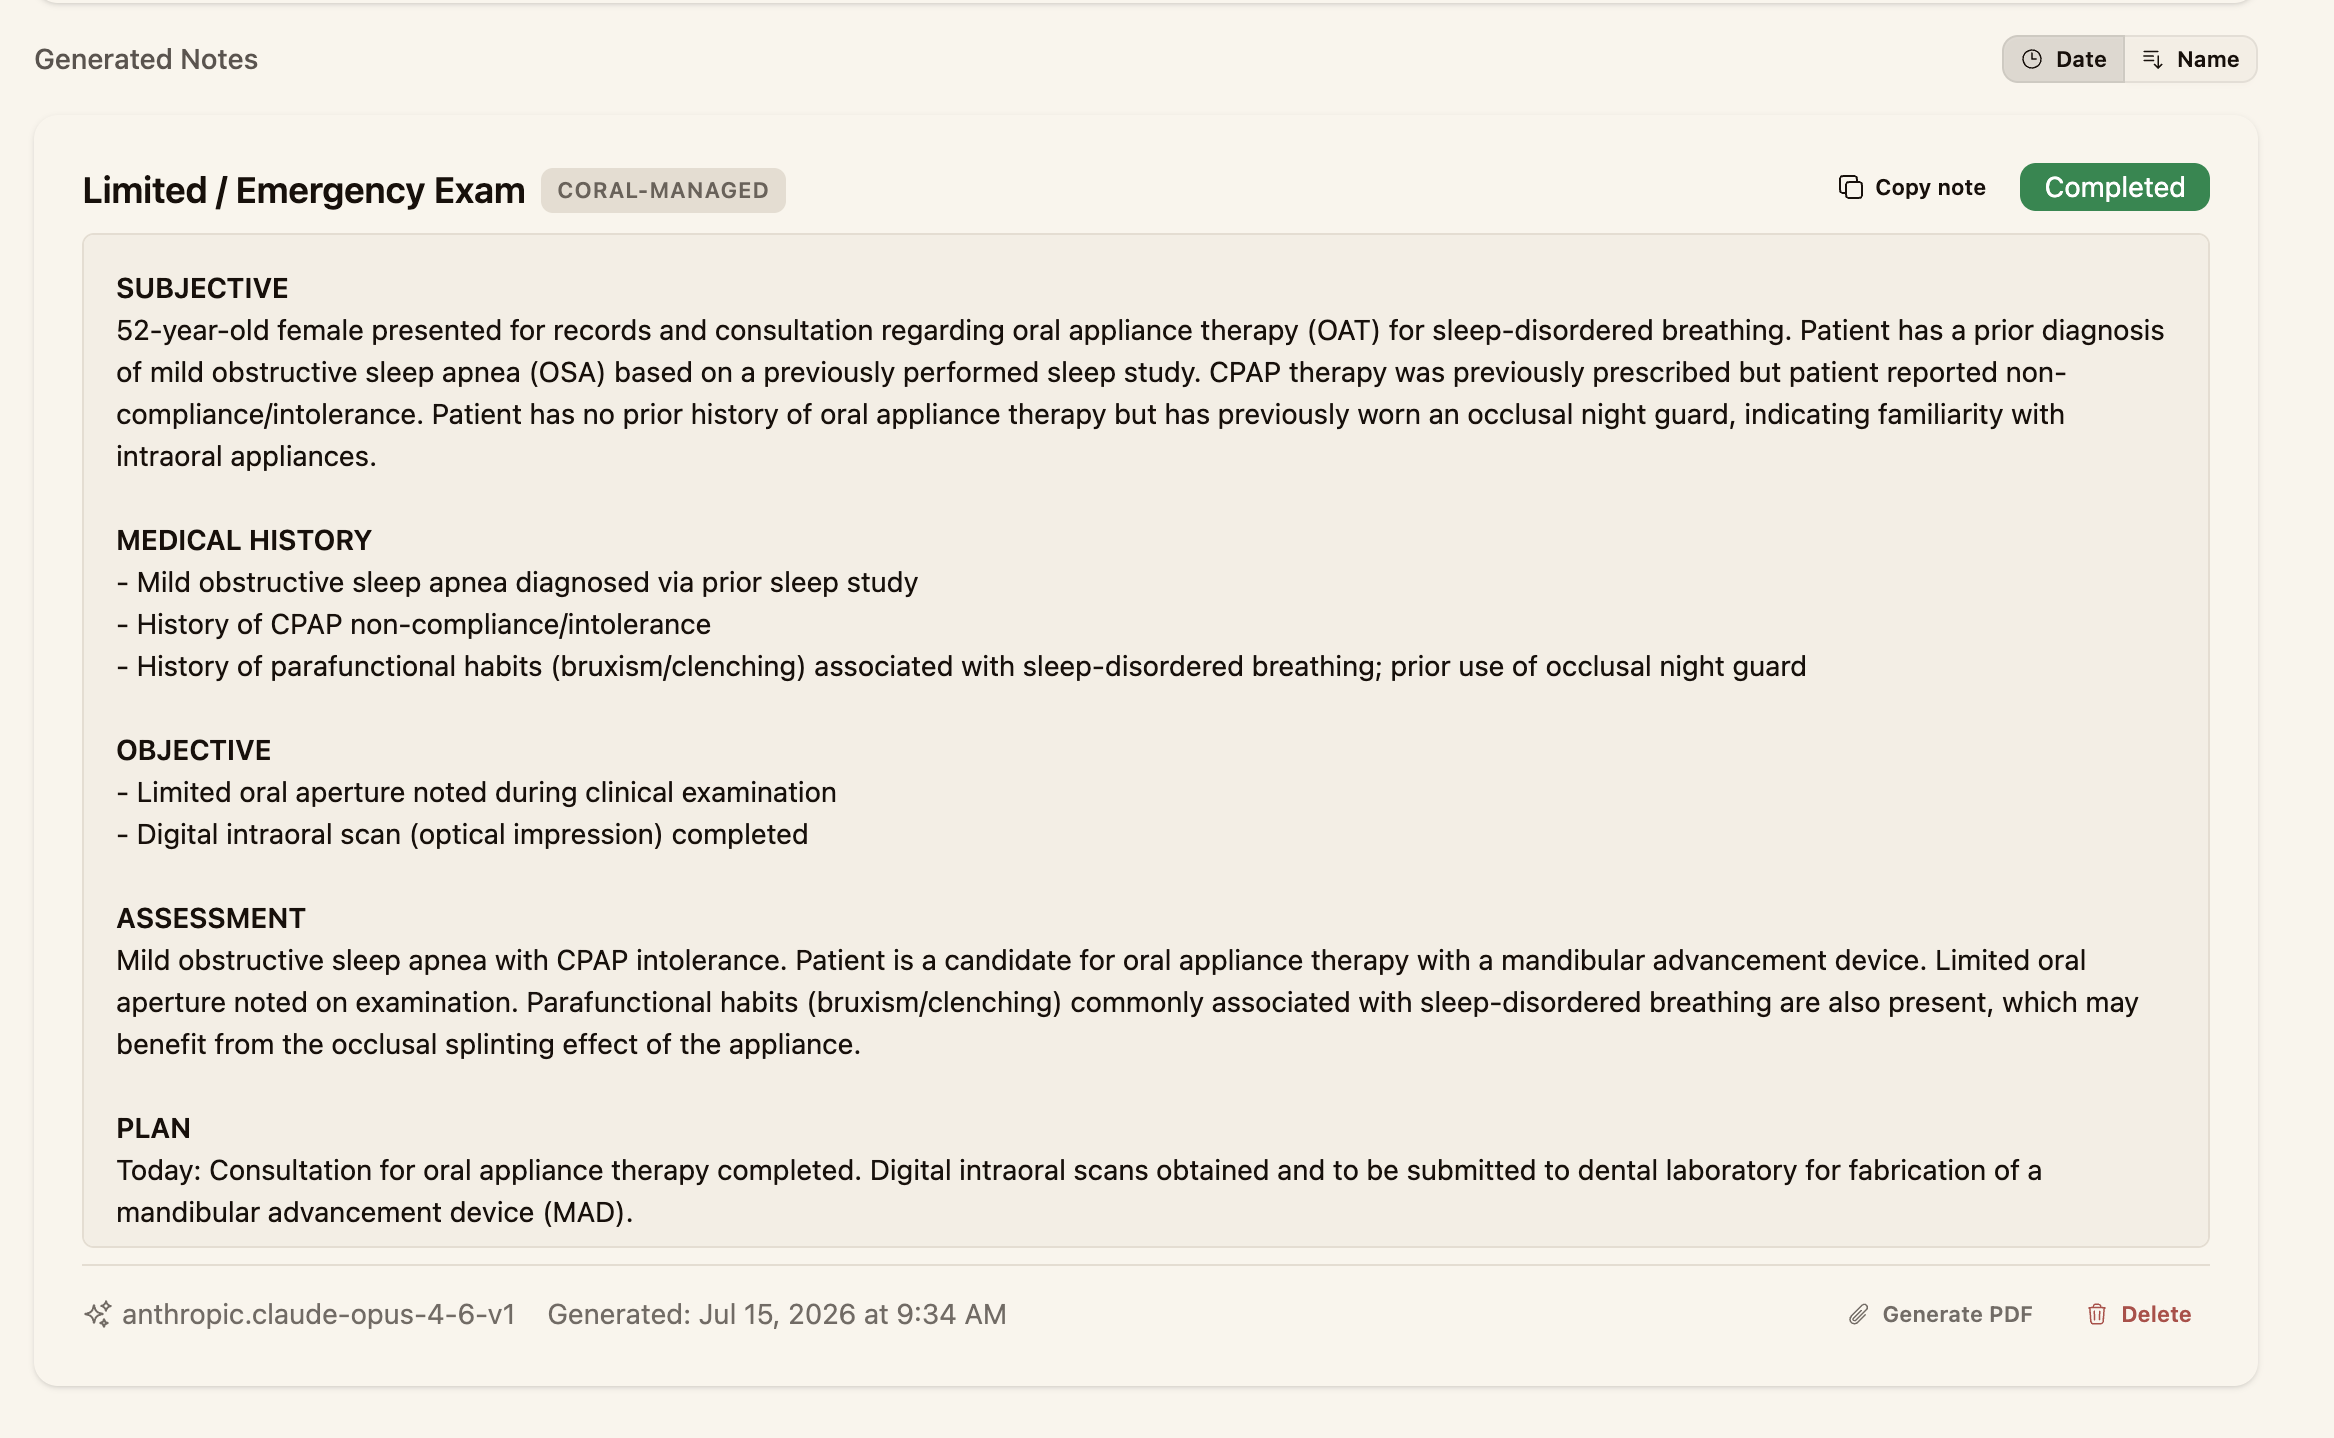
Once a recording finishes processing, open the Notes tab. Under Visit Artifacts, you'll find the Transcript Summary — it shows a Completed badge and a Copy note button when it's ready. Use Copy note to drop the summary straight into your chart.
With the transcript captured, you can continue the visit workflow:
- Add treatment and review codes on the Procedures tab (Adding Procedures)
- Generate documentation (How to Generate Clinical Notes)
- Build and submit the claim (How to Create a Claim)